Monday, January 31, 2011

What have I gotten into?

I haven't fished for over a month now and am feeling a little depressed and ashamed.  Thus I will have to get out this weekend.  The rivers are pretty high, although they are coming down now since it hasn't rained in a week now, so I'm not too fond of going in search of the dispersed trout I normally target.  I've been doing some reading lately in preparation of achieving goal #5 for the new year: targeting and catching a steelhead.  What I have read has made me realize that right now is probably one of the best times of the year to go in search of this quarry.

So I went to the local fly shop after work today to get some local knowledge and buy some stuff I don't have.  The older gentleman who helped me out didn't do a great job though.  I asked where to go and he said any coastal stream.  Thanks.  I wasn't hoping for a specific location, but maybe a couple of rivers that he thinks are good bets and some general areas would have maybe been nice.  Oh well, I'll make due with what I have.

After getting some meager advice on where to go I asked what to use in terms of gear and flies.  He said 7 or 8wt rod, which I already more or less knew.  He said sinking line or leader so I grabbed one.  He said a thingamabobber, which I have.  And finally we went to pick out some flies.  I couldn't help chuckling at some of the ridiculous things he pulled out.  Steelhead must be incredibly stupid fish to think these monstrosities are food.  To me it's a huge change.  I'm used to trout fishing, and when I use nymphs, my three top patterns are shown in the picture below right below the three monsters I bought today.  This is going to be a different experience.


Wish me luck!

Oh, and after I lose all of these big guys I will be prepared to achieve goal #6 of tying a big ugly streamer.  I bought all I need to do up the one of the left (it's the easiest).

Monday, January 17, 2011

Everyone else is doing it....

Well, I've read a number of other people's blogs about their new year's goals (thank god not resolutions) and have decided to jump on the bandwagon.  I have only thought about these for a day or two so this post may very well get updated in time.  But so far I have come up with plenty to keep me busy for most of the new year.


GOALS

1) Break the big double digit mark on followers!  Yes, double digits, big money.

2) Catch newest biggest fish of my life.

3) Catch my first salmon during a salmon run (will probably set goal 2 also here if successful).

4) Catch my first sea-run cutthroat.

5) Target and catch a steelhead.  I've accidentally caught a couple but I would like to do it without being a blind squirrel.

6) Tie a big ugly streamer (I've never tied one!).

7) Do a long weekend, long hike in to some mountain lakes somewhere and live (or die) off the land.

8) Compile a list of at least 20 places in the area that I want to fish.

9) Check off half of the places from the result of goal #8.

10) Start planning a trip to AK next summer.

Some of those goals will be easier than others.  I figure #1 will happen as long as Clif at Lunker Hunt keeps giving me the occasional advert on his more popular blog.  The salmon run goal is probably least likely since I know nothing about salmon fishing, but I do have an invite from a friend of a friend that I plan to take.  I hope the steelhead goal is first to go.  We are now apparently in the middle of the winter steelheading season here in the OR.

What fishes see

Have you ever wondered exactly how a fish sees your bait in the water?  I have, and this weekend I decided to figure out one aspect of how the fishes see.  I'm mostly a fly guy, so I pulled out my dry fly box and selected some of my main patterns to check out.  I know a lot of serious fly tiers will have some sort of viewing box set up permanently and will do this often, but I never have and found the results fascinating.

What I really want to watch somehow is how nymphs tink along the bottom of the river.  I'm not sure at this point how to go about viewing and recording that, so instead I'll just take a look at how dries sit on top of the water.  This is a much simpler observation to make.  I had to come up with a makeshift viewing box with the few materials I had lying around the house.  I chose a clear glass pie tin, and to support it I pulled a rack out of the oven.  The result was very high tech.  I turned my coffee table on its side, then placed the oven rack across one leg and the side of the top.  Finally, the pie tin with a little water in it went on top.  Done and ready!


Don't feel bad that you never thought this contraption up, I am quite smart.

Next I think it's pretty obvious:  toss a fly in and take a picture from below. It's pretty easy.  The only thing I'm still not positive on is how to light the fly correctly.  My first assumption is that fish will see your fly differently in different conditions.  Maybe that's obvious.  I think the best way to simulate a sunny day is by putting a small halogen lamp somewhere up above but probably not directly above.  That was what I did first and here are the results.  The flies are, in order of appearance, a sz20 midge dry, sz16 para-BWO, a sz18 LBF dry (see my recipe), and a 14ish stimulator.


And I have drawn some conclusions from these simple pictures.  First the top one is a size 20 and is almost too small for me to see any detail.  Thus, I conclude that in a midge hatch it's probably most important to get the size about right.  Maybe that's common knowledge but I just discovered it.  The way my brain works you can tell me this bit of info a number of times and I will forget it every time.  But now that I see why it is likely so, I've got it stored in my brain.

Another conclusion that I surprised myself with in this experiment is that I no longer like parachute flies!  The big circle of hackle that is wrapped around a post sticking out of the top of the fly doesn't look like anything.  At least in the normal style of dry where the hackle is wrapped around the hook rather than above it looks like legs.  Granted it looks like about 50 legs whereas a real bug will probably only have 6, but at least it can be mistaken for legs.

Finally, it really seems that color won't matter much on a sunny day because all the fish will see is the shadowed bottom of the fly.  The shade, as long as it's not way off, will probably not have much affect.

Writing all this makes me remember a seminar I sat in on a long while back at the Denver fly fishing expo where the guide said we should chose our flies based on "size, shape, and shade" and in that order.  Size is most important, shape should at least be reasonably close to a real bug, and shade is just that: shade.  Not color, not exact shade of gray, but general shade.  Meaning don't use a white fly where you need a black, but also in nearly all circumstances don't worry about using a black rather than olive, tan rather than gray, etc.  Again, I have to see it to really believe it and I am now a believer!


That's what those flies look like (hopefully) to a fish on a bright sunny day, but I'm not sure how to simulate a cloudy day.  Probably the best way would be to have a very brightly but diffusely lit room, but I don't have any of those nice photographer's umbrellas or very bright lighting so I'm just going to see what the fly looks like lit from the bottom.  I have a suspicion that on a cloudy day the fly shade may actually be tougher to see because instead of looking up at blank blue sky the fish is looking up at clouds which can be somewhat bright.  This is a challenge for another day, very soon I'm sure.

But if you are curious what some of these dries and others look like in water when well lit from below, here you are:


I bought the Adams (first picture) online a while ago and have always felt it has way too much hackle.  Seeing this pic, I still think that.  The LBF (second pic) looks pretty much the same except the gold hook is extremely visible!  I recently acqiured some black hooks that I like a lot more.  The caddis (third) I also bought online with the Adams and I think he hackle they used was about four sizes too big.  Other than that it looks reasonably close to what a caddis looks like (see below).  The sz20 midge is still really too small to see much detail.  I just hope fish don't have microscopic eyes.

Friday, January 14, 2011

Call the police if you see this man

Please call the feds if you see this man in public.  He is obviously a pedophile.


A source tells me he will be out fishing Cheeseman canyon this weekend.  Keep the kids away!


I hope everyone else finds mustaches as ridiculous as I do.  Let's stay away from the 60's and 70's please.

Monday, January 10, 2011

Bighorn river special III: Scud recipe

Well, I'm on a roll so why not add one more key fly to my Bighorn river go-to fly recipes.  This one is probably fly numero uno.  I have probably hooked more fish on the Bighorn river using this pattern than any other.  I was going to say more than all other patterns combined, but let's not go crazy.

For those of you unacquainted with aquatic insects, a scud looks a lot like a pill bug I think.  Just like a stonefly nymph looks a lot like an earwig.  Here's what a scud looks like:


Anyway, here's the instructions and recipe for tying scuds.
Ingredients
Scud hook (14-18, curved) 
thread to match the color you are going for (orange, pink, cream, olive, etc.)
Dubbing of the color your are going for (fine or coarse)
Lead wire (optional)
silver or copper wire
clear or pearl tinsel (or cut up some plastic packaging, like hook bags, into thin strips)


There are quite a few ways to tie these.  You can make them with bead heads, weighted or unweighted, with or without antennae or a tail, and in many colors all revolving around light colored cream.  Here is my simplistic method.

Start with a curved scud hook.  Add 5-8 wraps of lead wire somewhere near the center of the hook if you want your scud to be weighted.  The problem with doing this is you really need a way to mark your scuds as weighted or unweighted when you're done.  I haven't done this so I have a mystery mix.  Oh well.


Clip the lead wire ends and tie on your thread starting from the front of the hook all the way to the back and halfway down the bend.


Now add in a length of pearl or clear tinsel and some copper or silver wire.  I use long sections and keep using them for many flies.  They should both be protruding out the back end of the fly.  After tying those on, Dub up the thread fairly heavily, I have seen these done with coarse and fine dubbing.  I prefer fine...because that's all I have currently.


Dub your way up to the front of the fly and make it nice and fat.


Then pull the tinsel forward right along the top of the fly.  Tie it off.  Now wind the wire to secure the tinsel and segment the body.  Tie it off too and clip both.


Whip finish, and glue and you're almost done now, but not quite.  Flip the fly over and grab some sort of needle-like tool.


You want to make some fake legs under the fat body and the shell on top.  To do so, simply tease the dubbing away from the hook between each wrap of the wire.  When you're done it should look like this:


And now you will catch fish on the Bighorn river in Montana.

Bighorn river special II: LBF dry recipe

This is fly tying recipe #2 for those going with me to the Bighorn river in March.  And this is a super secret one too.  It was passed down to me from the chain cigar smoking, motor-mouthed, part-time guide Mick (sp?).  Two years ago we were fishing one particular spot where we had had some really good luck the year before.  We were throwing nymphs way out into the river and occasionally hooking some nice fish.

After a while another guy came up to us and started talking our ears off.  He was really nice and asked if we minded if he watched right up river for a spot where he knew some fish would be sipping on dries in the early afternoon.  We said sure, but you have to divulge all your river secrets to us.

He obliged.

And we went to school.

He taught us how fishing nymphs to the fish would slowly push them further and further out into the river.  As we waded further and further out, eventually he would tell us to walk back in because he saw some fish swim back behind us.

This river is a little different than most rivers I have fished.  The fish don't seem to care about anglers in the water.  They are not scared at all.  In fact so far on every trip there, at some point I have had a fish sitting one foot behind my leg resting out of the current.  And they would happily stay there until I walked away.  It's pretty stunning.

Mick basically acted as our guide all day long and would sporadically fish the pod he had come to fish.  He even let me fish his set up for a while when I lost my dry fishing his pod.  And before we all left the river to walk back to the parking lot together, he gave me a couple of the dries he used when the baetis were hatching.  They are insanely simple and surprisingly easy to see on the river.  The recipe is as follows.


Ingredients
Dry Fly Hooks sz 14-18
Black Hackle
Black Thread


Start out with the black thread on the hook, tied back to the bend.


Just like the emerger recipe I posted previously, next tie in a few hackle fibers,  I usually use 4-6 depending on the size of the hook.  Try to get them to fan out just a little.


Next build up the tapered body with just the black thread to about 2/3 of the way up the hook.  Once you are 2/3 up the hook, tie in an appropriately sized black dry fly hackle feather.  Sorry about the focus of this picture.


Wind the hackle feather around the body until you have a good amount of hackle, but don't over-do it.  Then tie off the loose end, make sure the body in front of the hackle looks appropriately fat, whip finish, and clip the unused hackle feather.  The final product should look something like this:


I remember when I saw this fly, my first question to Mick was "Can you see it on the water?"  He said "Yes."

He was right.  Especially in flat light, when there tends to be a bad glare on the water, this total black fly sticks out like a sore thumb.  When white parachutes disappear in the glare, this fly looks like a tiny black hole.  You will be amazed!

I also just had an idea about adding in some thin tippet material to give some segmentation to the lower body.  If I try this I'll add picture below and ask for comments.  I rarely see any segmentation on dries and never bothered to wonder why until now.  Answers????


I tried one with some 7x tippet for lower body segmentation.  What do you think?  I would say it's a waste of time because you can barely tell the difference, but it takes literally 3 extra seconds.

Sunday, January 9, 2011

Bighorn river special: LBF emerger recipe

This post is made for the sole purpose of showing Clif of Lunker Hunt how to tie a certain special Baetis pattern that is guaranteed to catch on the Bighorn river in MT.  At least I have had good luck with it when the Baetis are coming off.

Ingredients you will need:
Nymph or emerger hooks size 16-20.
Black hackle (this could be substituted if you don't have it)
Black thread
Grey or black dubbing
Turkey flats (could be substituted with just about any dark feather fibers)
Pheasant tail feathers (again, same as above)


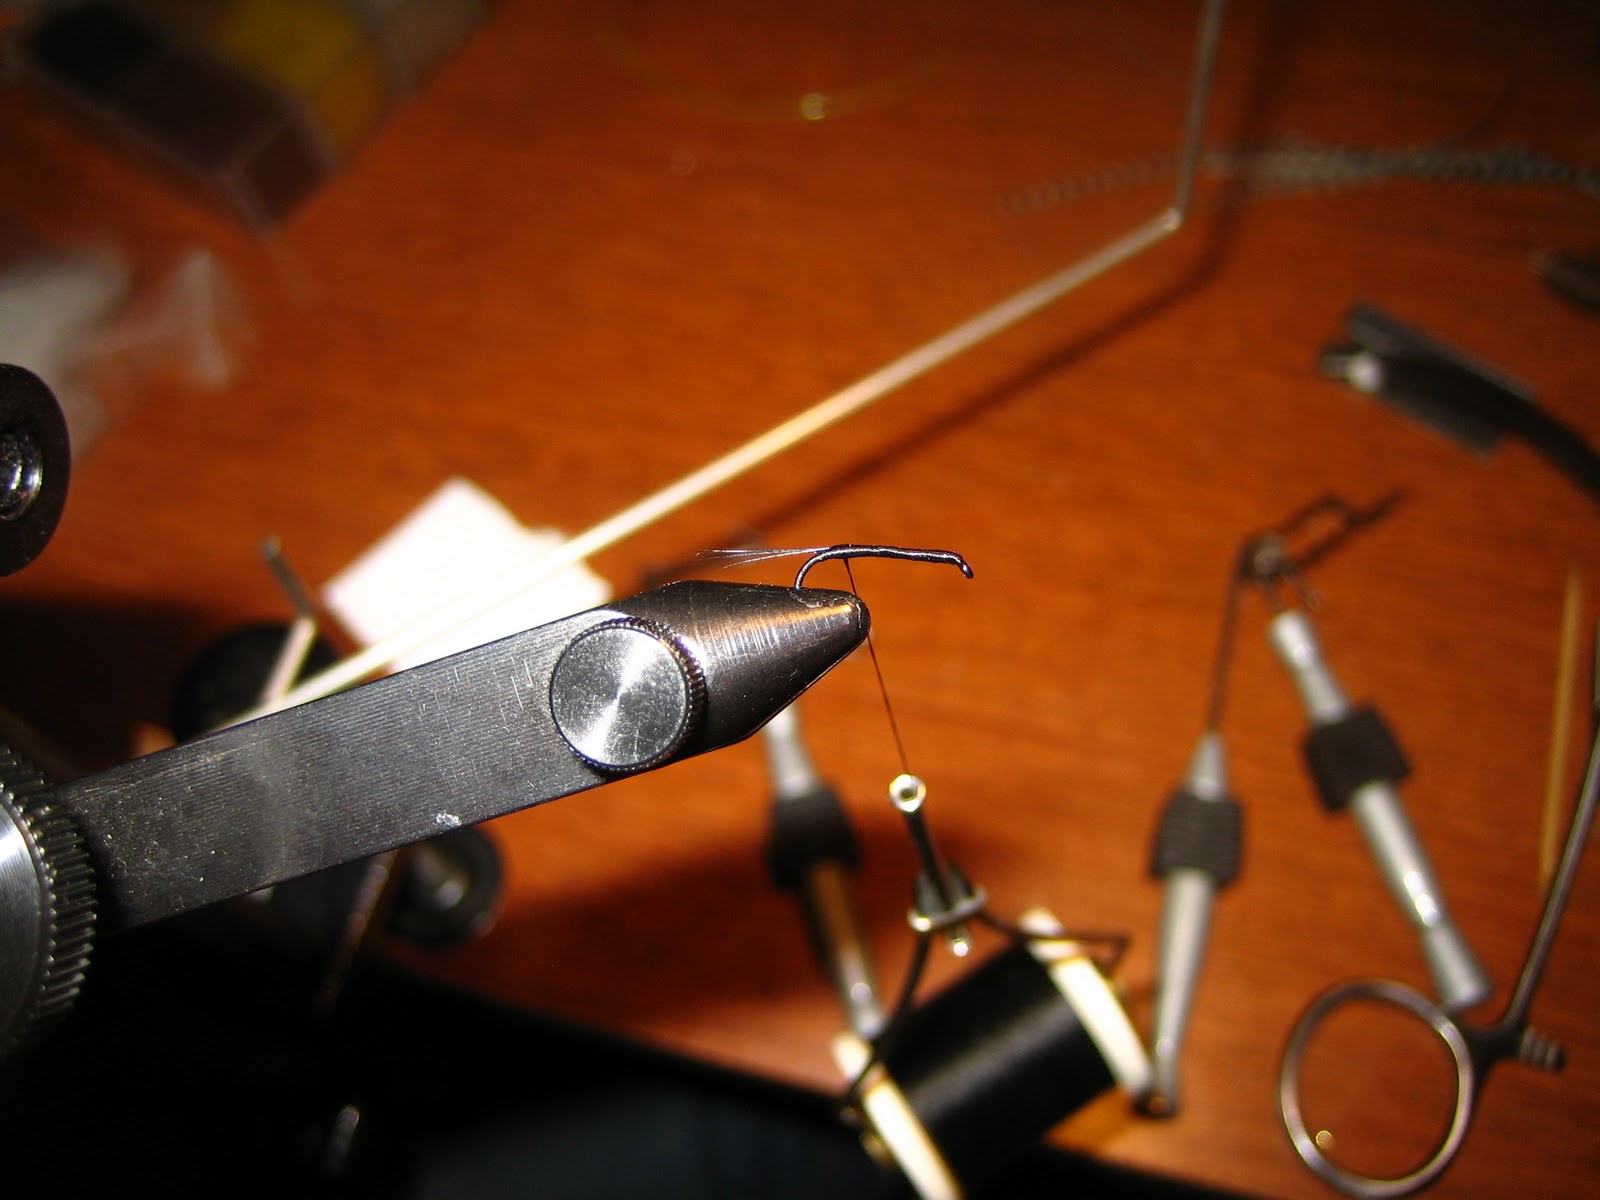
Start with the hook.  I have listed a Nymph or emerger hook, but didn't specify straight or curved.  I have really only seen these tied on straight hooks but I don't know why.  In the water, the bugs that this pattern mimics squirm around and definitely could be curved.

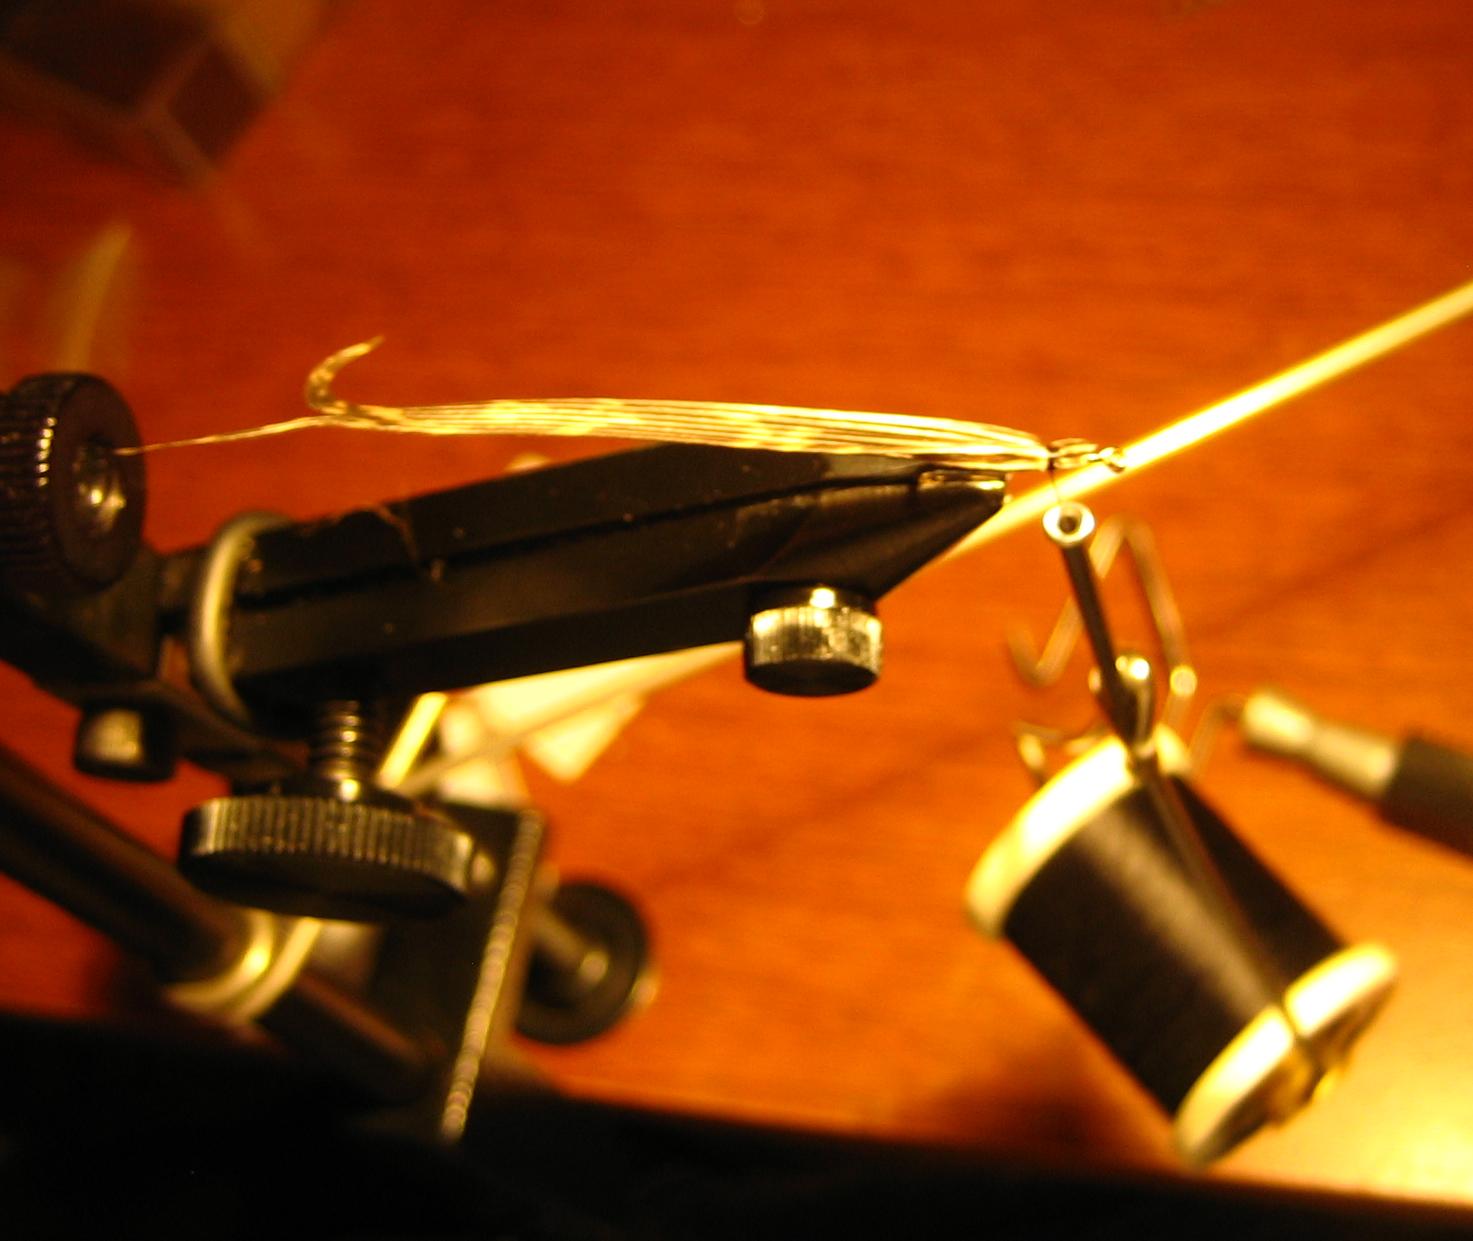
Tie black thread on the hook all the way back to the bend.  At the start of the bend, tie in 3-6 black hackle fibers with the tapered ends sticking out the back an additional 1/2 - 3/4 of the length of the hook.  If you don't have black or dark hackle, you could use a couple pheasant tail or other feather fibers.  It's not that important, trust me; I asked a fish once.  Ideally when you tie in the fibers they will fan out a little bit rather than being in one fat clump.  You can tease them and play around with the way you tie them off to enhance this.


Next build up the body with just the thread.  Baetis emergers are quite thin so making a bulky body out of dubbing is not really the best in my opinion.  Just wind the thread up so that the body slowly builds, and do this about 2/3 of the way up the hook.  When you reach 2/3 up the hook, tie in the Turkey flats (or your substitute), with the fuzzy side down, and protruding toward the back of the hook.  Like this:


Now you're ready for the pheasant tail fibers that will serve as the legs.  Try to get 6 fibers all tied on to the top of the fly, pointing forward.  Getting the length right is the hardest thing with this fly. You will either end up with legs that are way too long or way too short the first 50 times you tie this, at least I did.  You'll figure it out.  See two photos down for an idea of what's about right.


Once you wrap around the pheasant tail fibers with your thread a few times you can trim the back ends off.  Save them for later use on another fly or toss them, it's up to you.  Next add a small amount of dubbing (I use black or gray).  This gives some bulk to the thorax where the wings will come out of....if it were a real bug.


Next bend the pheasant tail fibers back, and split them so half go on each side of the fly.  At the same time, pull the turkey flats forward, and when you do the Ptails should stay pointed out or back.  This is the most frustrating part of tying this fly.  Tie off the turkey flats.  Next I always pull the turkey flats back again, tie them off again and then clip.  This extra unnecessary step I hope helps keep the fly from falling apart if it gets poked at by a fish's teeth (hopefully) or the rocks of the river. 

Whip finish and you're done.  You can play around with the way the legs sit out.  I usually do because I'm a bit of a perfectionist and like it to look pretty in my box, but once you fish it for a few minutes they're going to go where they want to anyway.  This is what it should look like when you're done:


This fly isn't really special.  It's just a WD40 tied in black thread.  But it's special just the same.  The dubbing in the picture above looks a little fatter than it really is for some reason.  In reality it about doubles the diameter of the body directly behind it.
One thought in retrospect.  You can tie the wingcase with pheasant tail fibers too rather than turkey flats.  What you can't do is use the 6 fibers that you used for the legs because it's not enough.  That's what I used to do and I hate the weak sauce wingcase that gives you.  You could use the ends that you clip off the leg portions of a few flies since they are wasted anyway, though.  If you use 12-15 fibers you would probably be good.  I used turkey flats because they are much wider and I happen to have them.

You could also add some very thin silver or copper wire to add segmentation on the lower body, but I have never done this or seen it done.  The bugs themselves are of course segmented, but on the black of their body it's fairly hard to see, or at least the fish tell me so.

Tie on!

Organization? Who needs it.

What does your fly tying desk look like?  I just realized through a picture that mine is a bit of a mess.  It looks like this:


It's a total mix of controlled chaos and organization where necessary.  Hooks and beads and things of that sort are neatly organized in a container (top left).  Some extra threads, wires, tinsels, etc. are stored on top.  I made a holder for my bobbins a while back by drilling some small hole in a piece of scrap wood (top right).  My dubbing was organized for me when I bought it, and my flybox sits in the middle so I know what I need more of.

Beyond that the contents of my desk are a bit of a semi-controlled chaos.  A whole bunch of stuff not pictured to the left is 4 or 5 hackle capes, some paper towels, and some other random feather products.  What is in view is an assortment of tools that migrate all over the surface of the desk and often go missing, glue that once in a while gets knocked over and spilled, hackle feathers that still have a few flies left in them, copper and silver wire sections, and a few other random tying items that weren't used up on the last fly I tied.

Does anyone care?  I feel the need to post something since it's been like a whole month.  Thats what happens when the rainy season hits and the rivers turn to mud....and you don't know much about high water fishing.